
Authorize.net
Be sure to first ask support to enable the Authorize.net Payment Processor extension.
Configure Payment Processor’s API Access
NOTE: The following assumes that you already have an Authorize.Net merchant account. If you don't, you can go to the Authorize.net web page to sign up.
If you do not already have an API login and Transaction Key, generate these now from the Authorize.Net account page, under Settings, General Security Settings.
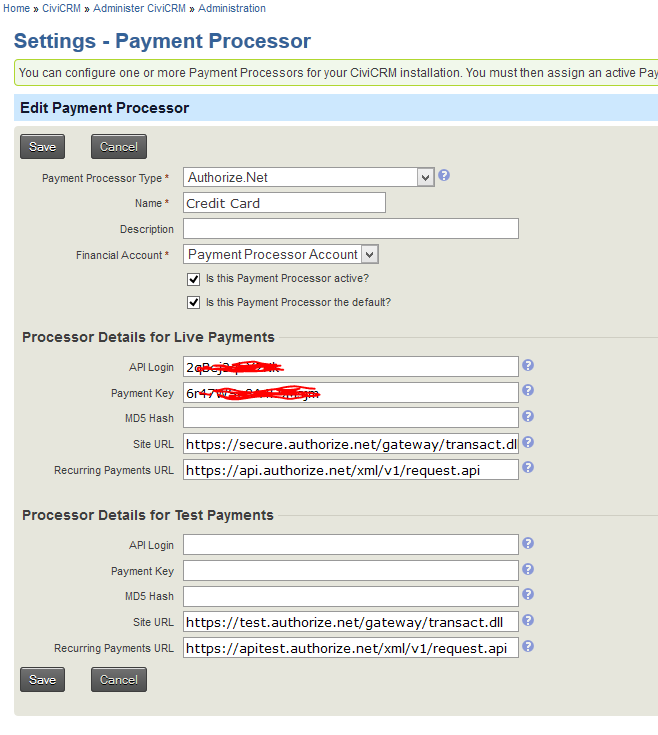
After this is done, create the Authorize.net Payment Processor configuration in CiviCRM:
- Log into PowerBase as a PowerBase administrator
- Select Administer » System Settings » Payment Processors
- Select Add Payment Processor
- For Payment Processor Type, choose Authorize.Net
- Use a Name like “Credit Card” unless you have multiple payment processors.
- Set Financial Acccount as needed for linking to your accounting system.
- Enter the API Login ID and Transaction Key values (Live and/or Test as needed). Transaction Key goes into the field labeled Payment Key. These values should be provided to you by Authorize.net.
- The MD5 Hash is best left empty.
Site URLs
The Site URLs should be pre-populated for you. In case they get accidentally changed or deleted, the values should be:
Live Payments
- Site URL:
https://secure.authorize.net/gateway/transact.dll - Recurring Payments URL:
https://api.authorize.net/xml/v1/request.api
Test Payments
- Site URL:
https://test.authorize.net/gateway/transact.dll - Recurring Payments URL:
https://apitest.authorize.net/xml/v1/request.api
Accepted Credit Cards
- To see the list of credit cards that Authorize.Net will process, select Merchant Profile in the Authorize.Net Account Settings screen.
- In the Administer CiviCRM screen, select Accepted Credit Cards
- Disable any cards which are not accepted. If there are any cards accepted which are not listed, add them.
Testing
Please see our tip sheet on testing
Additional Documentation
For more information on the Authorize.Net Advanced Integration Method, see the AIM guide.
Category:
Admin Tasks
Managing Contributions