
Why use webform?
Most PowerBase users are familiar with the standard tools for online organizing, e.g.
- Using a Contribution page to solicit contributions or solicit memberships
- Using an Event page to invite people to register to attend an event
- Using Profiles so people can sign up for your newsletter
- Using Petitions
However, there are times when these methods don't quite work. For example, if you want people to:
- sign up and create a custom activity at the same time; or,
- register for your event and optionally make a contribution; or,
- make a contribution and create an activity; or,
- sign up two people at the same time (e.g. a parent and a child with a relationship); or,
- simply receive an email after they have filled out a form
All of these kinds of data entry are possible using Webforms.
Preparing PowerBase
Sometimes, you may need to do some work in PowerBase before making your webform.
For example, if you want to record an activity with a custom activity type or any custom fields that don't yet exist, you must first create them in PowerBase. For example, you may want to create a Custom Activity Type (Administer -> Customize Data and Screens -> Activity Types) and/or create custom fields (Administer -> Customize Data and Screens -> Custom Data).
Once you create them in PowerBase, they will be available in the webform.
Creating a Basic Webform screen cast
Getting Started
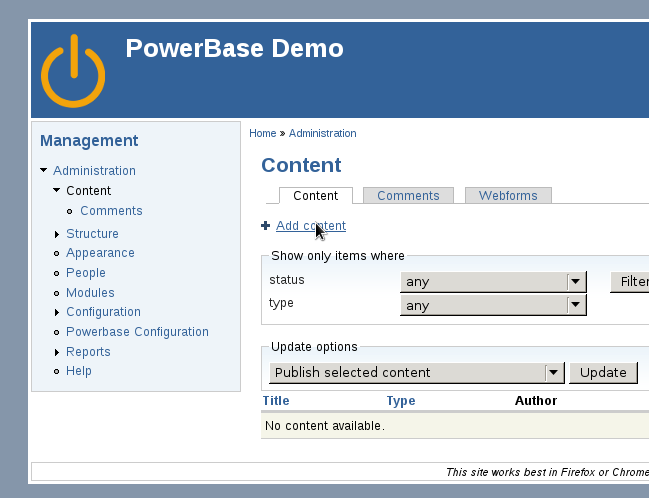
To begin with, click Administer -> Drupal Administration to get to the Drupal area of your database.
Next, click Administration -> Content -> Add Content
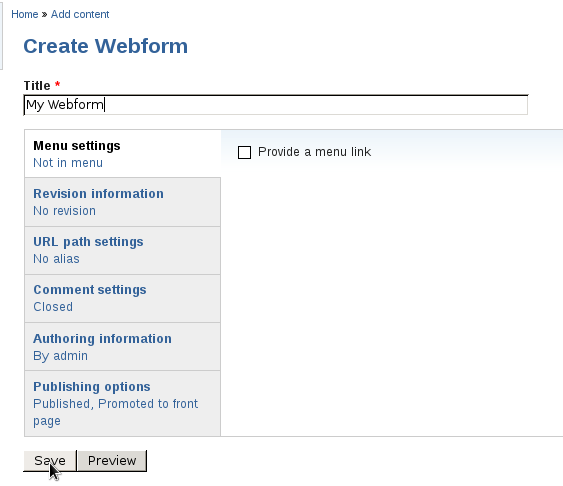
Then fill out a title and click save.
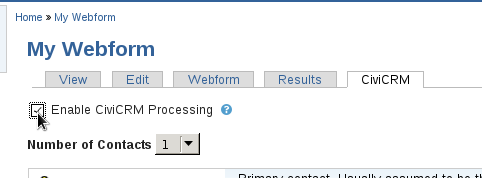
Enable CiviCRM
Click the CiviCRM tab and enable CiviCRM Processing
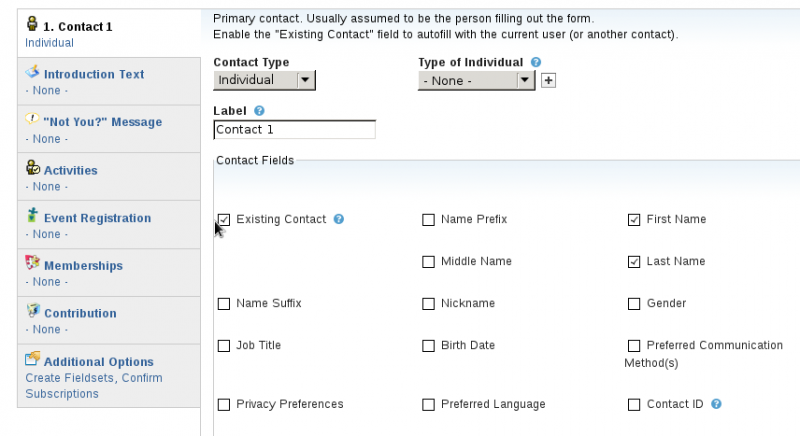
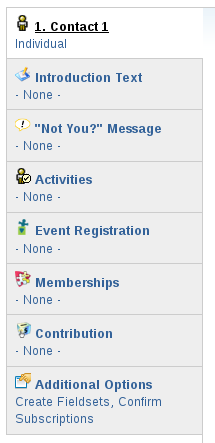
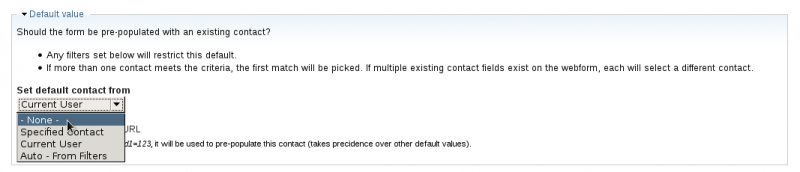
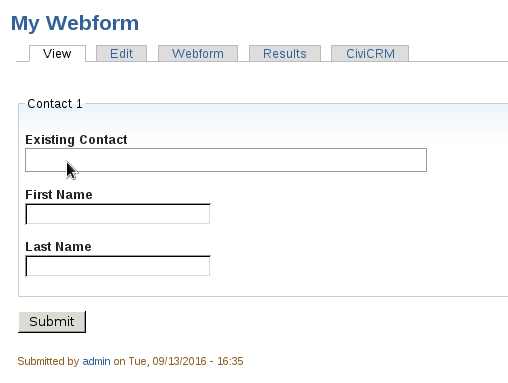
Choose the contact fields you want to appear.Existing Contact is a special case! That allows you to select a contact that already exists in your database to update. It's a useful feature if you are creating a webform for staff or volunteers to fill out however if you are making a public webform be sure to uncheck that field.
You can add a lot more things to your webform, including contribution pages, memberships and event registration. Click on the tab for each area and then select the fields you want. When you are done, click save.
Making more adjustments
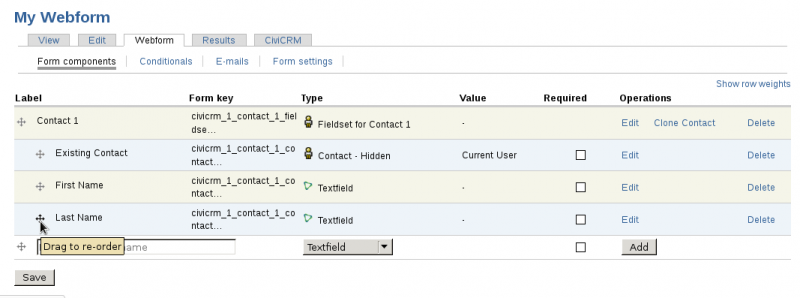
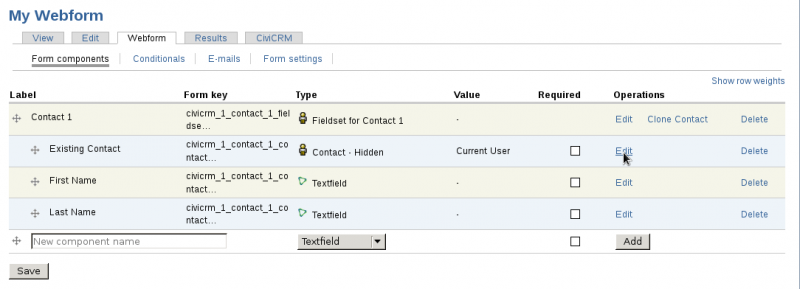
After you have clicked save, you can review the fields that you included by clicking the webform tab. You can change the order if you want.
You can also edit a field to change it's properties (like the default value or the way it is displayed)
For example, you can change the "widget" (way it is displayed)
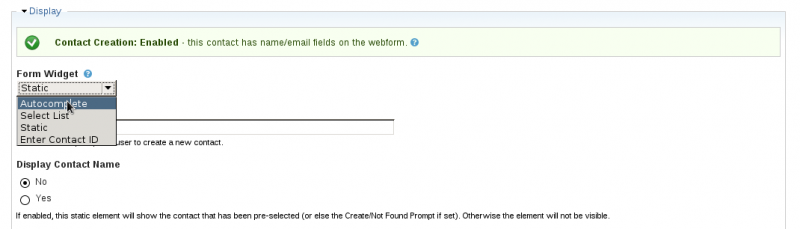
And the default value
When you are done, click the view tab to see the results
Webforms are quite complex and powerful so please feel free to contact support with questions on how to use them the most effectively.
If you are interested in diving in fully, please see the full Webform CiviCRM documentation.
Additional Webform Screen Casts
- Scenario: Creating an internal Intake Form or an alternative data entry form - screen cast
- Form settings - permissions
- Email Notifications
- Using look-up or search fields and caveats
- Making it Pretty! Working with fields and labels - screen cast:
- Editing labels to display questions or display bilingually
- Field display options: Hidden, Private, changing lists to checkboxes or radio buttons, etc.
- Displaying some options and not others
- Setting default values
- Moving fields and hiding fields
- Using Fieldsets to group fields together
- Using conditionals to decide when to show fields (or group of fields in a field set)
- Collecting information from more than one contact and creating relationships - screen cast
- Adding additional text using Markup - screen cast
- Using webform custom fields vs. Powerbase fields - screen cast
- Using webforms to create anonymous surveys - screen cast
- Setting themes - tip sheet
- Setting recaptcha - tip sheet
- Seeing the submissions to my webform - screen cast