Description
Petitions are public web pages that you can use to mobilize on-line support for an issue. By inviting people to "sign" the petition (by adding their contact information) you can educate people on the issue and collect their contact information so you can continue mobilizing them in the future.
There are two kinds of petitions available through PowerBase:
Standard Petitions: Essentially, an online sign-on form - you write text, create the petition, and then the petition form records the signer's contact information. A List of signers can be printed and delivered.
Email petitions: Optionally, you can also setup a petition that, when signed, generates an email to a target. Signers are presented with a default email subject line and a default message, both of which they can edit before submitting. The target can be one or more contacts in your database (Static List) or, you can send to the signer's state legislators or city council members based on the address they enter (Dynamic List).
If you plan to create email petitions where you want to match the electoral districts to the addresses of the signers so that it displays their elected officials for their districts, you will first need to set up the Electoral API Extension to add Voter District Info to your Powerbase. More information on setting up the Electoral API Extension can be found here.
Screen cast on using the Electoral feature and Petitions Demo
Standard Petitions
Screen cast:
Standard Petitions Written Documentation
Regardless of the kind of petition you want to use, all petitions start as a standard petition.
Click Campaigns -> New Petition.
Fill out a title and introduction that will be displayed to people who are directed to your petition.
If this petition is part of a bigger campaign, you can optionally choose the campaign with which to associate petition responses.
Next, select a Contact Profile. You may need to create the contact profile first if the "Petition Email Contact Info" profile is not available. This profile determines what information is recorded about the person signing the petition (e.g. name, email, address, phone, etc). Make sure when you add the email field to the profile, that you select "Primary" for the location type of the email and make it required. The address or phone fields can use the "From the Web" location type.
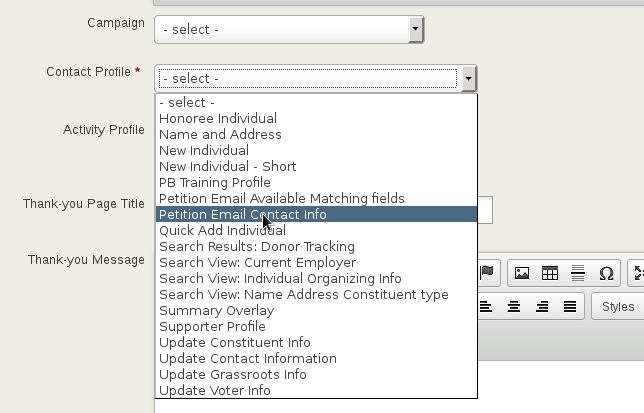
The "Activity Profile" is optional and not recommended. The only reason to include it would be to ask the signer some specific questions in a survey-like manner. If you want to ask specific question of the signer, create a custom data group that is used for Activities of the type Petition Signature. Then, create a profile that includes these fields. However, if you are just interested in collecting contact information, leave the "Activity Profile" empty.
Fill out a Thank You Page title and message that people will receive when they fill out the petition.
And lastly, decide whether you want to by-pass email confirmation or not.

By default (with this option un-checked), anyone who signs the petition will have to check their email and click through a link sent to them before their petition signature is recorded.
If you are planning a short campaign and will be taking this petition offline after it ends, by-passing email confirmations will help boost the total number of signer and make it generally easier to use. However, for longer campaigns, spammers will discover the petition and you will get more garbage petitions if you by-pass the email confirmation.
Done!
For more information on the petition process, check out the CiviCRM User and Administrator guide.
Email Petitions
Screen cast:
Email Petitions Configuration
To use the Petition Email feature you will need to enable the CiviCRM Petition Email extension - you will need Powerbase Administrator permissions or you can reach out to support for assistance.
If you are sending to a static set of targets (in other words, everyone who signs the petition will generate an email to the same people), then you can skip to Getting Started With Email Petitions below
On the other hand, if you want the petition to be sent to the signer's elected official based on the address they enter, you'll need to install the Electoral API extension as well. Our instructions on how to install it are here.
And, you will need to register for an external service to perform the address to elected officials lookup. You have a few options:
- Open States is free! The only downside is that you can only lookup state senators and representatives. If you want to target city council members, read on.
- Cicero charges a small amount per lookup, but has the most reliable data for both state senators, state representatives and city council members. Note: Before buying any credits, be sure to test a few of your addresses using Cicero's online demo. They have generally good data, but do not have 100% coverage of city council.
- Google Civic is also free, but the data is less reliable then Cicero and, maybe Google has enough of our data already?
Click on any of the service provider links to create an account. Once you have an account you should be issued an "API Key", which is like a long, random password.
With your key in hand, click Administer -> Systems Settings -> Electoral API to get setup.
Your first question is to choose which of the providers to use:
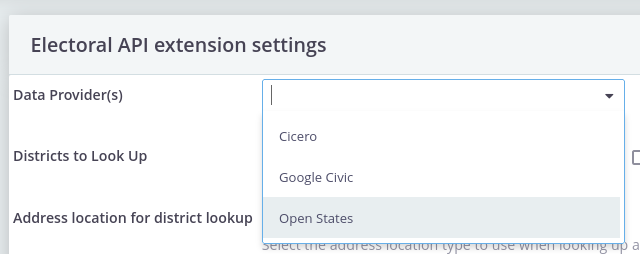
Then, you will be prompted to enter some additional information:
- Districts to Lookup - For the purposes of petitions, only choose "State/Province" and "City". The "Include future districts" is a nice way to get district info for districts undergoing a re-districting process but it's only available for Cicero and it will be ignored by the petition email extension anyway.
- Address Location for District Lookup - You typically want to choose "Home", but the value is ignore by the petition email extension, which will always lookup the address the signer types into the petition form
- Countries, States, Counties, and Cities is also ignored - the petition email will attempt to lookup whatever address is entered.
- District Lookup on Address Update and Create official on district lookup can be left blank (and will be ignored by the petition email extension).
Getting Started With Email Petitions
First, set up the petition following the instructions to set up a Standard Petition (above).
If you would like to send an email to a target every time a petition is signed, look for the "Petition Email Delivery Options" section at the bottom of the new petition form (Note: If you don't see this section, contact support - we may need to enable the extension that provides it).
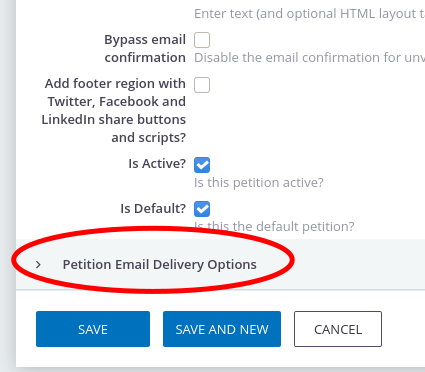
Once expanded, you are given a series of options.
Recipient System
Your first option is to choose the recipient system. You can choose a set of static recipients (e.g. a governor or CEO) or you can choose to dynamically lookup the signer's elected officials using the options you have configured via the electoral extension.
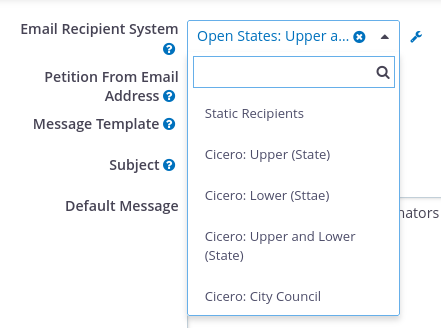
From email address and default subject and body
After choosing your recipient system, you'll choose a from email address, and draft the default subject line and body of the email message:
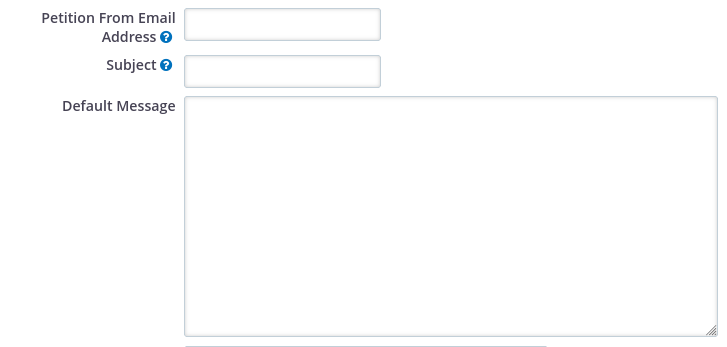
When your petition is signed, an email will be sent from the signer to the target. When the target opens the email, they will see the petition signer's name in the From field of the email. If the target clicks reply, the reply will go to the petition signer's email address. And, the petition signer's name and email address will be printed at the top of the email sent.
But, the email address in the From field will be the one you specify on this form (e.g. From: Maria McSigner <petitions@yourgroup.org>). Why? The Internet has many new fraud detection technologies in place. If Powerbase sends an email that claims to come from a gmail.com address, for example, then the target's email system will flag it as fraudulent and it will end up in their spam folder.
The default subject and message fields provide the initial text. The petition signer will have the ability to modify both before sending the message. See below about the BCC field - it is important that a human being gets a copy of every message sent so you can monitor abuse of your petition.
Address field matching
If you are dynamically looking up legislators, you have to match the address fields from your profile so the extension can properly look up the address.

If you don't see any matching fields, check your contact profile setting in the standard petition section. You must include all address fields in your contact profile for the matching to be successful.
To and Bcc

If you are using one of the dynamic lookup systems (state legislators, etc) then you do not need to enter anything in the To field. Your targets will be chosen automatically.
But, you still can add static recipients if you want (e.g. you could send each petition to the signer's specific state senator and also send all signatures to the governor).
The only caveat is that you must first enter the target in your database. If you are concerned about a target existing in your database and receiving your regular newsletter, etc. you can enter them with the communications preference "No Email". With this setting, they will be omitted from receiving your regular email but they will still be sent petition email in which they are the target.
Lastly, you are encourage to enter a BCC (e.g. to yourself) so you can notified every time it is filled out.
Send away
When you are ready to go, create a new mailing to send to your outreach group. In the body of the mailing, include a link to the petition signing page (You can find that link by going to Campaigns -> Dashboard -> Petitions and clicking the "Sign" link next to your petition, then copying the URL from your browser's address bar).
The standard link looks something like this:
https://ptp.ourpowerbase.net/civicrm/petition/sign?sid=3&reset=1
That's the link you send people who are not in your database, for example, if you are posting to your web site or your social networks.
If you are sending the link by PowerBase mass email, you should use the personalized version, which includes a few extra pieces and looks something like this:
https://ptp.ourpowerbase.net/civicrm/petition/sign?sid=3&reset=1&{contact.checksum}&cid={contact.contact_id}
If you use this URL, then the contacts information will be pre-filled on the form, making it much easier for them to sign your petition.
