
The following steps will allow you to easily and regularly import contributions from Facebook.
The first time you do an import, you will need to setup field mappings - which is tedious. However, by saving those field mappings you can re-use them every time.
Download your data
Begin by downloading your data from the previous month as a CSV file. Be sure to include the column headings. If you are unsure how to download data, the Facebook help file should help.
Edit the spread sheet
Each time you download a new file, you must insert three columns before you can import it into Powerbase (in Excel, select the column, then select Home > Insert > Insert Sheet Columns - do it three times to insert three empty columns).
Create the following three labels in the top rows of each new column and copy down the values for every row in your database:
- Status: Set to "Completed" for all fields
- Payment Method: Set to "Credit Card" for all fields
- Financial Type: Set to "Donation" for all fields

(Depending on how you download your data, your colums may appear differently.)
Once you have set the first row of data to the desired value, you can drag the corners of the cells all the way done your sheet to copy the values to the bottom.
Import Contributions
Next, click Contributions -> Import Contributions from the top menu.
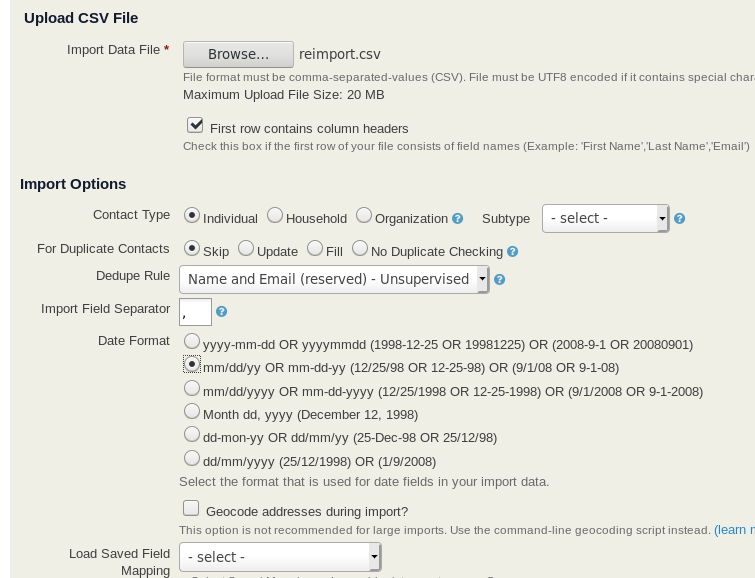
- Click the button to upload your file.
- Check the box: First row contains column headers
- Set the date format to mm/dd/yy
If this is the first time you have imported, then leave "Load saved field mapping" alone. On the other hand, once you have done an import, you can select your field mapping from the drop down list to save time in the future.
Field Mapping
On the next screen, you will see a list of the headers from your import file in the left column. In the middle columns will be the first few rows of your data. In the last column on the right, you can select which Powerbase field you want to map the data to.

You will only be setting a few of the fields:
| Facebook field | Powerbase field |
|---|---|
| Payment ID | Transaction ID |
| Donation Amount | Total Amount |
| FB Fee | Fee Amount |
| Net Payout Amount | Net Amount |
| Payout Currency | Currency |
| Tax USD Amount | Tax Amount |
| Charge Date | Date Received |
| First Name | First Name (Match to contact) |
| Last Name | Last Name (Match to contact) |
| Email (Match to contact) | |
| Payment Method | Payment Method |
| Fundraiser Title | Contribution Source |
| Status | Contribution Status |
| Payment Method | Payment Method |
| Financial Type | Financial Type |
Note: we don't import address - that will come later for contacts not already imported into your database.
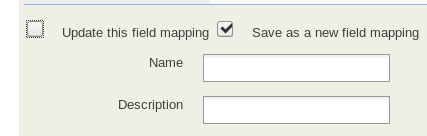
If this is your first time importing, click checkbox to save the field mapping and give it a memorable name.
Click continue.
Perform Import
Click the import button and review the results.
If there are no errors, then you are done. Congrats!
Any contact that cannot be matched by an existing contact in the database will be reported as an error. In the example below I only imported one record that did not exist in the database:

Click the link to download the errors and review them. The first column will be the line nubmer, the second column will be the error. If all the errors are: No matching Contact found then you can safely delete the first two columns of the spread sheet and re-save as a CSV file.
We will use this spread sheet for the next few steps.
Import contacts
First, we have to import these rows as contacts. Then we will re-import the contributions.
Click Contacts -> Import Contacts
Just as you did with contributions, click to upload your new file.
Indicate that it includes column headers.
With contact imports, you can skip duplicates. Also, be sure to use the de-dupe rule called "Name and Email".
If you have already imported contacts, you can select your pre-saved mapping. Otherwise, you can save one on the next step.
Field Mapping
With contacts, we only want to map the contact related fields, not the contribution related fields. Since this field will not have headings for the fields we didn't import in the previous step, you will need to match based on the values. In short, you want to be sure to match:
- First Name
- Last Name
- Email Address
- Street Address
- City
- State
- Postal Code
If you have not done so already, be sure to save the field mapping for the next time.
Click to continue
Import
Run the contacts import and review the results. All contacts should be imported successfully.
Re import contributions
Now, using the exact same file you just imported (via contacts) repeat the step above for contributions. This time they should all match.